
Lomg before I had conceived of the Three Kingdoms setting, I came up with a number of map parts. One such set was a collection of Sewer Tile Map parts. With these tiles, you can make pretty much any sewer layout.
The tiles were created with Roll20 in mind. The tiles scale well to presenting a sewer based adventure on the Roll20 system. Having paving slabs exactly one square in size makes this particularly effortless.


Get the sewer collection for free
If you like, you can download the full collection of tiles that I have made. All I ask is credit for my work and that if you share them on that you do so as freely as I have shared with you.

Sewer Map Tiles by Matthew Brown is licensed under a Creative Commons Attribution-NonCommercial-ShareAlike 4.0 International License.
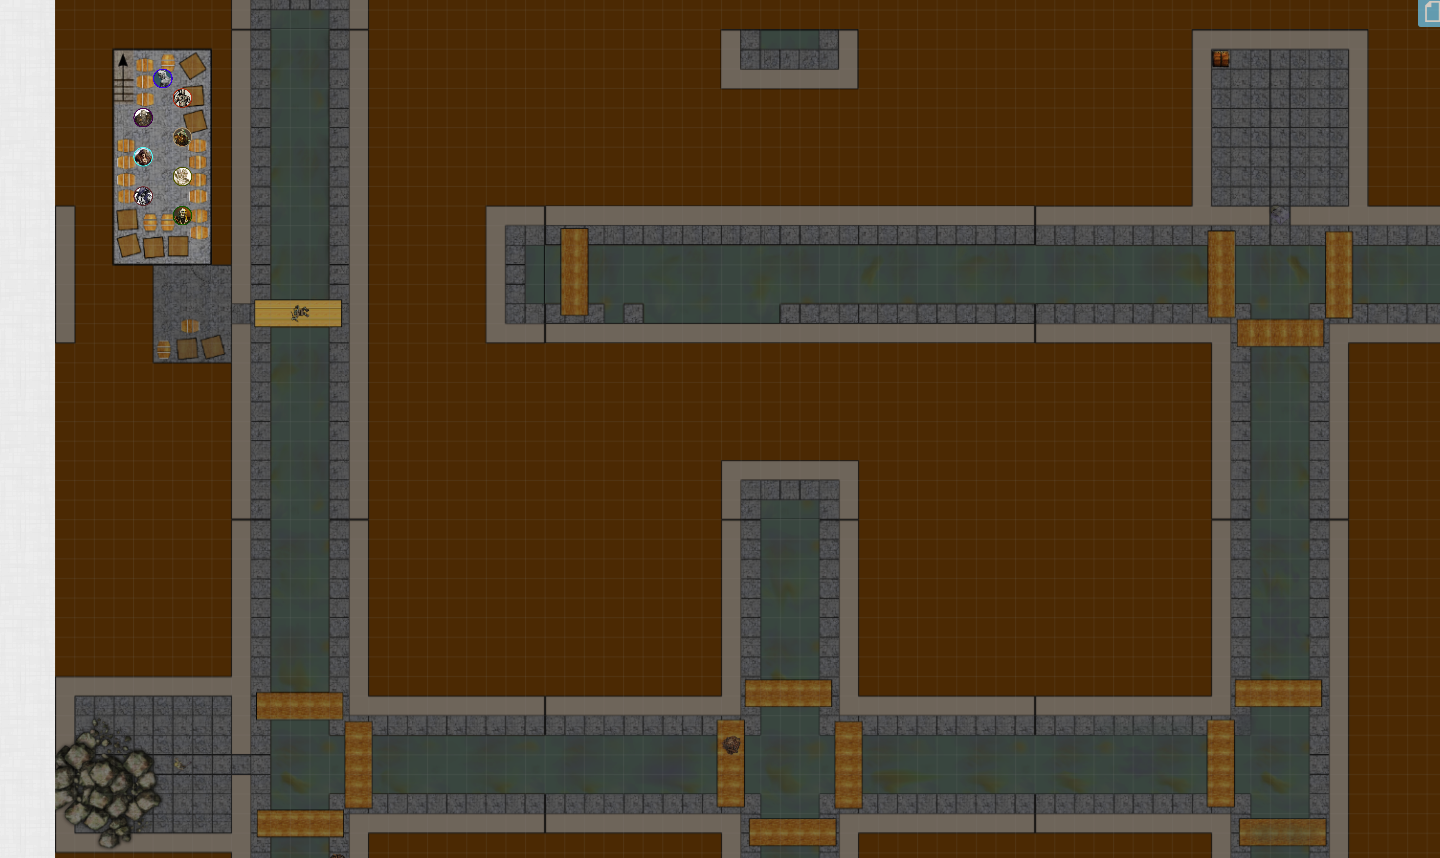
Here are the tiles in action on Roll20 for a one-shot I created in case our group needed a single session game for some reason.
How I made the tiles
What sort of nerd would I be if I did not tell you how I made the Sewer tile-set? Including the “turn back or swim tile”. A tile where, if the PCs are walking on the “wrong side”, they find the path simply runs out forcing them to turn back or swim in sewer water (yuck).
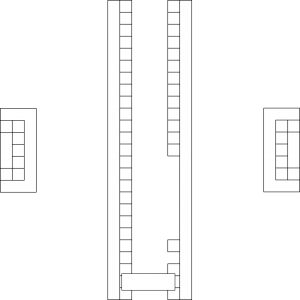
I started off in Inkscape where I created the basic assets from which the tiles were made. This allowed me to position the edges so that they would always line up.
At this stage, the planks were just rectangles (super easy and quick to make). They only started to look like planks in the second stage.
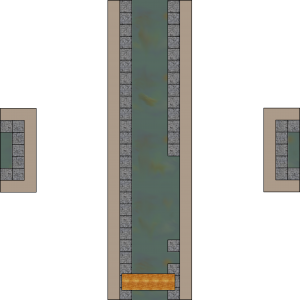
Then, I exported each tile as an image, fired up GIMP and got to work colouring them in. For some parts (like the stonework and planks), I used a texture; while for the “water” I messed about with flood fills and airbrushes until I was happy.
If the ones that GIMP comes with are not enough, you can find a lot of creative commons and public domain textures and images that can be used as textures.
For the T-junctions, I only made one tile and rotated it by 90° to make four T-junctions. The same is true of the “rooms” because that was just a lot less work.
As you can see, the colouring is what brings the tiles to life. The only weakness in this design is that the joins are noticeable. each passageway was a rectangle and I did not blank out the end passage outline which results in a double thickness join. For my next set, this is something I will have to remember to avoid.
How I made the map in Roll20
This was the easy bit. I just added images to the map layer, used the pathways to make sure the scale was correct, and the just fiddled with the layout until I was happy.
Then I added some assets – rockfalls, a dead body, and so forth. I wrote up some notes and the adventure was ready to be run. Mostly my notes were the sort of illnesses PCs might contract from a dip in the stinky water and setting appropriate monsters.
You can see the player tiles all set out in the cellar ready for the adventure to start. There are two basement starting points in the full set. They use assets created for a tavern map I am working on.